
Pull apart bread
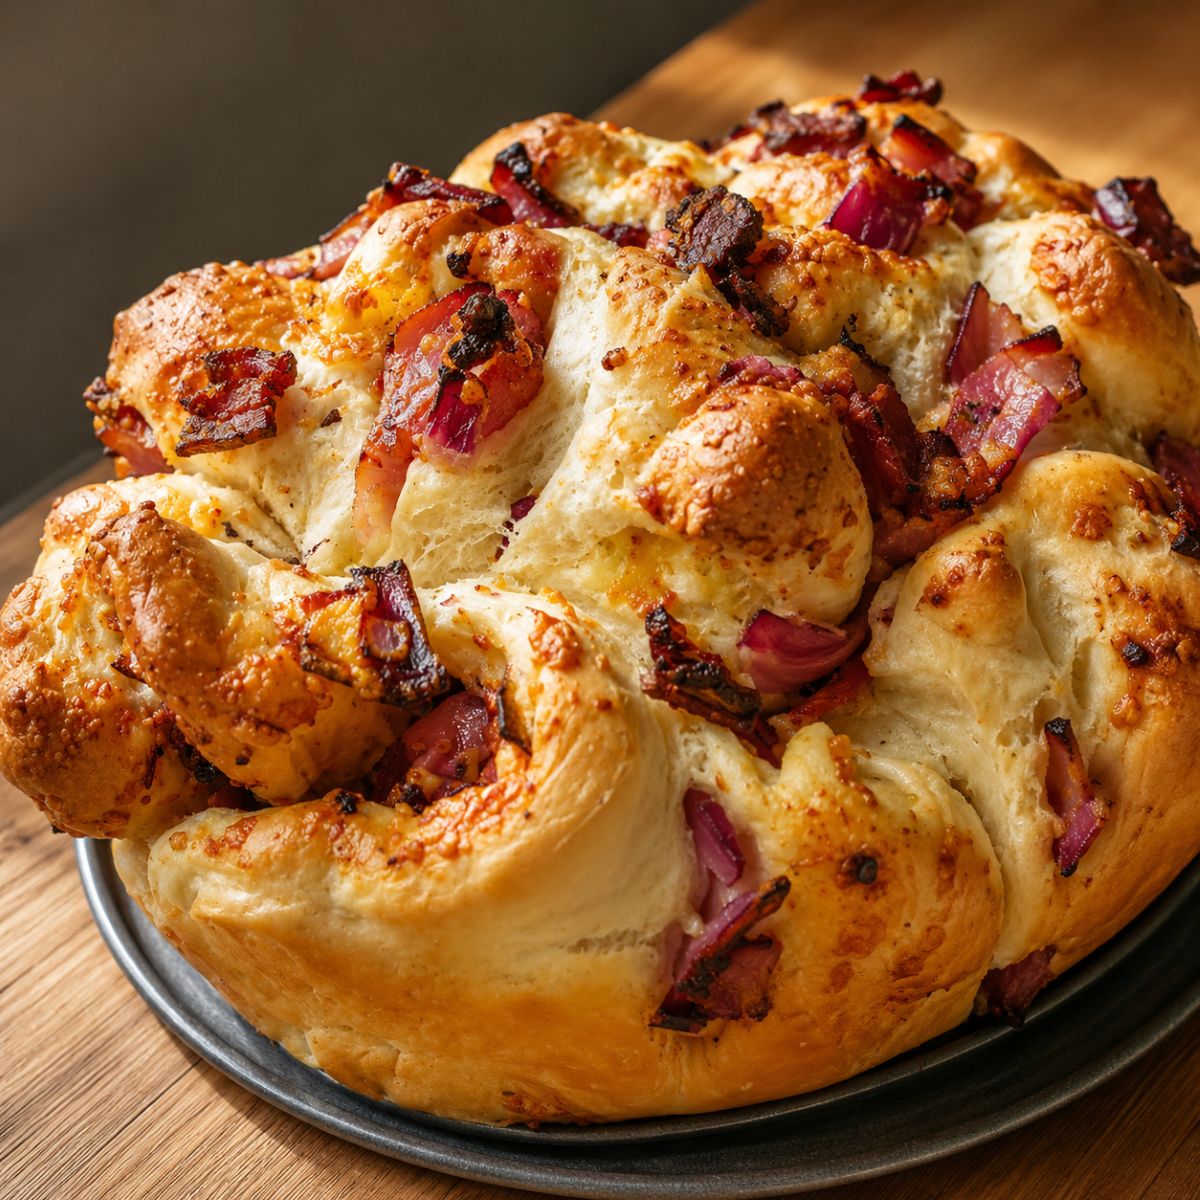
Pull-Apart bread has to be one of the easiest yeasted doughs you can make. This is a recipe that you can make on reasonably short notice (at least in the world of yeasted doughs). It’s a same-day bread recipe with yeast. Its a great bread in the Thermomix, as its makes the process a little quicker. But, no execuses, as I’ve included a recipe for using a stand mixer as well.

🍞 What is Pull-Apart Bread?
Pull-apart bread is the best thing since sliced bread—literally! It’s made from layers of dough, stacked with fillings like cheese, garlic, and herbs, and baked into a soft, fluffy loaf meant to be pulled apart piece by piece. Each bite is packed with flavour, making it impossible to eat just one piece.
Why you’ll love this recipe
- Easy to share: Perfect for gatherings, just set it in the middle of the table and watch it disappear.
- Customizable: Swap out the fillings with your favourites—think sun-dried tomatoes, olives, or even bacon bits.
- Crowd-pleaser: Cheese and bacon are a combination everyone loves!
What can you include in your pull-apart bread?
You can choose anything you like to pop inside. Savoury is an easy choice with a little bacon, but it’s very versatile and will take a few vegetable leftovers, or some garlic, sun-dried tomatoes, olives, etc. You can also add some more cheese to make it extra yummy.
Once you’re happy with the base dough and technique, it’s very easy to change the personality of this bread.
Savoury variations
- Herb and garlic only – skip the cheese for a lighter side that still has beautiful flavour, but add some little cubes of butter to keep it moist and delicious.
- Cheesy chilli – add finely chopped fresh chilli or dried chilli flakes to the garlic butter; this is a great way to use up odd bits of leftover cheese, too.
So you want Sweet Pull-Apart bread?

Your imagination is the only limit to the choice of fillings. You can make them savoury or sweet. It’s so quick and easy, and all up to you.
For a sweet alternative, add an extra 2 Tbsp of sugar to the dough, and when you’re making your pull-apart, try almond meal, butter, sultanas, and a sprinkle of sugar. Yummmm, cheap and no added non-food items.
Chef tip: Wash and soak your sultanas first
- Some dried fruit is very dirty. It pretty much depends on what brand you’ve chosen, but I always wash.
- Soak the fruit. Once your fruit has absorbed a whole lot of liquid, it is less likely to burn or dry out your bread in the oven.
- Try soaking the fruit in orange juice, maple syrup and water, honey and water or alcohol for a grown-up pull-apart.
Frequently Asked Questions
Can I make this without a stand mixer or Thermomix?
Yes – mix with a cutter or spoon until it comes together, then knead by hand until smooth and elastic; it will take a little longer, but the dough is very forgiving.
Can I use instant yeast instead of active dry?
You can usually swap by weight and skip the blooming step, mixing instant yeast straight into the flour; just keep the liquid warm and proofing times similar.
How do I stop my bread from being dense?
If your dough is tacky and soft, avoid adding too much extra flour when kneading, allow it enough time to rise until doubled, and be careful not to over-bake; all of these factors will help keep your bread soft.
What size tin works best?
A standard loaf tin or 8″ round (roughly 9 x 5 inches / 23 x 13 cm) suits this style of pull-apart; fill it about two-thirds full before the final rise.
Can I freeze pull-apart bread?
Yes – bake, cool completely, wrap well and freeze; reheat in a moderate oven wrapped in foil until warmed through so it tastes freshly baked again

Savoury Pull Apart bread – Thermomix
5 stars tells us you love the recipe
becs-table.com.auEquipment
- 1 Thermomix
Ingredients
- 300 g water
- 10 g dry yeast
- 520 g white bakers flour
- 1 tsp salt
- 1 tsp sugar
- 20 g olive oil
For the filling
- 20 g Olive oil
- 2 rashers streaky bacon chopped
- 1/2 red onion sliced
- 1 Cup mixed cheeses what ever you like but mozzarella and tasty work well together.
Instructions
- In your Thermomix weight in 300g of water set for 37°c/ 3 mins/speed 1. Then add the dry yeast on top of the water, missing the blades and leave it for 5 minutes to soften and start activating.
- Weigh in your 520g of flour covering all the yeast then add your salt, sugar and oil. Mix for 5 seconds/ speed 4.
- Now set to knead for two mins. Keep an eye on your machine, they like to walk.
- Leave the dough in the Thermomix to prove (as long as I don't need the bowl for anything else of course). It should double in size popping out of the top of your Thermomix about an inch if you leave it in. Another way is to pop it in your Thermo Server if you have one. Your Thermo Server is an ideal proving chamber for this amount of dough. It's best if you warm it up first. Boil the jug and pour in the hot water, leave it for 5, minutes then tip it out and dry the bowl as quickly as you can. Use a little oil to coat the inside of the server bowl then place in the dough and pop on the lid. Leave it to prove, once the lid pops open about 2 cm, it's proven enough.
- Once your dough has proved, knead again for 5 seconds to release it from the sides of the bowl then tip out the dough. Roll into a ball cover with a cloth then gather the remainder of your ingredients.
- Weigh the cheeses into the TM bowl and grate for 5 seconds/speed 6 then set aside.
- Add the onion to your TM bowl and chop on speed 5/3 seconds. Add the chopped bacon and oil and set to 5 min/100°c/reverse sp + 2. Once the time is up, leave to cool.
- Prepare a tin or tray. If you have a springform tin use that otherwise just butter and dust a standard cake tin, or you can even just stack them all together on a large tray, for a free-form shape if you wish.
- Roll your dough out into a rectangle (around a 1cm thick) onto a clean lightly dusted surface. Don't use too much flour, in fact; I find most of the time I don't have to add any extra flour to my bench at all because it's a perfect consistency. Although all flour is different and if you find yours is a little sticky you'll need to do a little dusting. (of flour that is)
- Once you’ve rolled out your dough, you’ll need to layer your fillings over the top. Using a knife or pizza wheel cut long strips of equal length and width. Take one end of a strip and gather it folding back and forth as you go. Then sit it upright it in or on your prepared tin. Continue this process till you have all the dough in, remembering to leave a few gaps for the dough to rise.
- Now it's ready to go into the oven. You can either let it prove a further 1/2 an hour to an hour or set your oven to 200°c and pop it straight in. This second rising can be done slowly as the oven reaches full temperature. Keep an eye on your creation, and when the top is a deep golden brown, it's ready to pull out and pull-a-part. Oh, leave it cool a bit first.

Savoury Pull Apart bread – Conventional
5 stars tells us you love the recipe
becs-table.com.auEquipment
- Stand mixer
Ingredients
- 300 g water
- 1 Tablespoon yeast
- 520 g white bakers flour
- 1 teaspoon salt
- 1 teaspoon sugar
- 20 g olive oil
Instructions
- Add warm water (around 37°c) to your stand mixer bowl then sprinkle your yeast on top. Allow that to sit for around 5 minutes.
- Once 5 minutes is up, add your flour, then salt, sugar and oil. Set your stand mixer to knead for 5 mintues. Once the time is up, cover the bowl with a teatowel and start preparing the filling.
- To make the filling chop the onions and bacon and fry gently in a pan until the onion is transparent. While that is cooking grate your cheeses.
- Prepare a tin or tray. If you have a springform tin use that otherwise just butter and dust a standard cake tin, or you can even just stack them all together on a large tray, for a free-form shape if you wish.
- Roll your dough out into a rectangle (around a 1cm thick) onto a clean lightly dusted surface. Don't use too much flour, in fact; I find most of the time I don't have to add any extra flour to my bench at all because it's a perfect consistency. Although all flour is different and if you find yours is a little sticky you'll need to do a little dusting. (of flour that is)
- Once you’ve rolled out your dough, you’ll need to layer your fillings over the top. Using a knife or pizza wheel cut long strips of equal length and width. Take one end of a strip and gather it folding back and forth as you go. Then sit it upright it in or on your prepared tin. Continue this process till you have all the dough in, remembering to leave a few gaps for the dough to rise.
- Now it's ready to go into the oven. You can either let it prove a further 1/2 an hour to an hour or set your oven to 200°c and pop it straight in. This second rising can be done slowly as the oven reaches full temperature. Keep an eye on your creation, and when the top is a deep golden brown, it's ready to pull out and pull-a-part. Oh, leave it cool a bit first.
Want to know more?
If you enjoyed making this yeasted dough, why not have a go at making Thermomix crumpets too?
Would you like to learn how to make Easy Overnight Sourdough?
This looks amazing! Would it work with a good quality gluten free baker’s flour do you think?
Hi Anita, If you have a good GF bakers flour you like to use, absolutely. Use your recipe and just follow the steps for the filling and assembly and it will be fine.
Thank you so much! Keen to try this soon!
Let me know what you think if you get the chance.
Excellent and simple. A true crowd pleaser. Lasts a day after cooking before you need to freshen it in the oven or microwave. Usually doesn’t last at all once everyone tastes it!
Thank you so much for taking the time to leave such a lovely comment! I’m thrilled you enjoyed the recipe and found it both excellent and simple. That’s exactly what I was aiming for—something everyone will love! You’re right, it’s usually gone in no time, but it’s great to know it stays tasty if you need to freshen it up the next day. Thanks again for sharing your experience! 💖
Cant see any cheese, onion, bacon on ingredients list
Hey Joanne,
Sorting it out right now.
G’day Bec I made this today and it came out great, true!
Look forward to my blog post re Thermomix recipes, but here is a link should (in the interim) you wish to view!
Cheers! Joanne
I used speck…as had on hand and it too about 20 minutes…
Thanx for sharing Joanne looks fantastic.