
Quick Pickling

Are you looking for a way to add a zesty kick to your meals? Look no further than these easy Quick Pickles that you can make on the stovetop or Thermomix! These pickles are a game-changer in the kitchen, perfect for topping burgers, jazzing up salads, or serving as a tangy side. Let’s dive into this simple yet flavourful recipe that’ll have you pickling like a professional in no time!

Pickling versus Quick Pickling
What is traditional pickling?
Traditional pickling is the preservation and flavouring of food using techniques that allow it to be stored for a long time (typically years) without refrigeration. Acid, usually in the form of vinegar, is the primary method for suppressing microorganism activity. However, sterilisation (often through heat) of both the food and the containers contributes to achieving extended storage periods.
How does quick pickling differ?
Quick pickling prioritises the quick infusion of that wonderful pickle flavour. The pickling ingredients, and primarily the acid from vinegar, will extend the usuable life of the food, however the simpler processes involved with quick pickling typically results in foods with a life of just a few weeks, even when refrigerated.
Why you’ll love these Quick Pickle Recipes
Quick pickles, also known as “refrigerator pickles” or “quickles”, are the perfect solution for those who love the tangy crunch of pickled veggies but don’t have the time (or the patience) for traditional pickling methods. They’re ready in just a few hours and can last up to a month in the fridge. Plus, with the Thermomix, you’ll have the brine prepared in a jiffy that’s precisely the correct ratio of ingredients!
First, there’s a great recipe on the Thermomix Cookidoo® site called Quick Grated Pickle (Thermomix® Cutter, TM6), which can be found here. 👈 but keep reading below for another recipe (non-Cookidoo) that you may find interesting.
Ingredients
- 150g vinegar of your choice (apple cider, white wine, etc.)
- 60g caster sugar
- 150g water
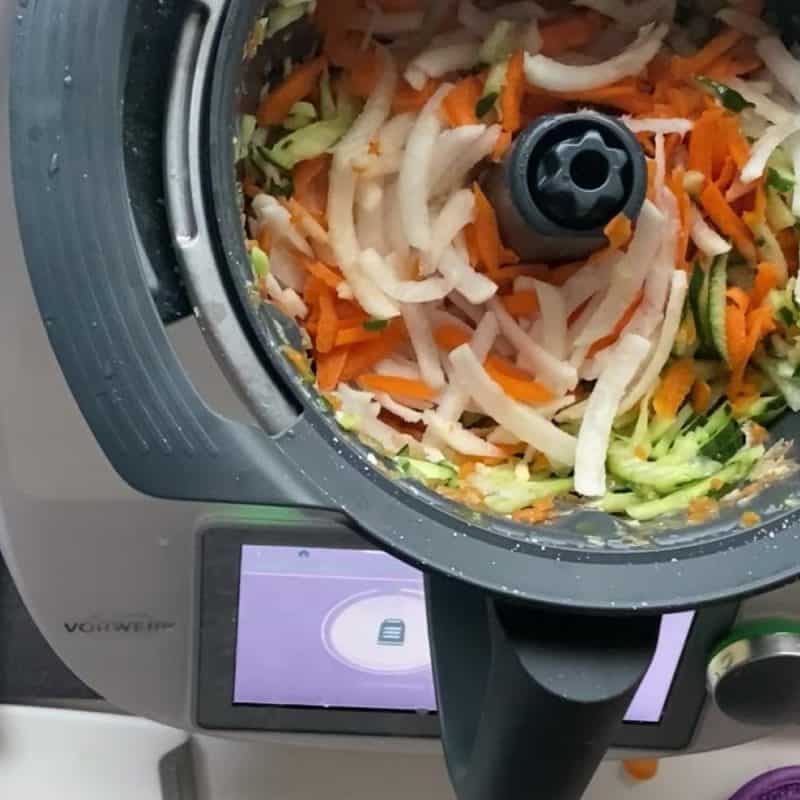
- Vegetables of your choice (daikon [white radish], carrot, and cucumber all work beautifully)
The video below explains a bit of what happens with the Thermomix method for the above recipe on Quick Grated Pickles.

Chef Tips for Perfect Pickles
I’ve never really got into the lengthy process of making pickles, but this method is right up my alley. However, making jams, relishes, chutneys, and sauces is my idea of fun. If you’ve been following me, you’ll know that quick and easy is what I’m all about. Actually, it’s more about feeding my family and friends brilliant food; after all, it’s how many of us share our love. 💖
Choose your Vinegar Wisely
The type of vinegar you use will significantly impact the flavour of your pickles. Apple cider vinegar lends a fruity note, while white wine vinegar offers a milder, more delicate taste. Try using distilled white vinegar for a classic pickle flavour; there are so many choices (and further reading here…)
Experiment with Spices
While the Thermomix recipe is pretty basic, it’s still delicious. But don’t be afraid to get creative with spices. Try adding a few peppercorns, coriander seeds, mustard seeds, star anise or a bay leaf to your brine for extra depth of flavour. I could go on and on with ideas here.
Slice for Success
The secret to quick pickles is to have thin, uniform slices. This allows the brine to penetrate the vegetables evenly and swiftly. If you’ve got a Thermomix Cutter® or mandoline, now’s the time to whip it out! Just watch out for those fingers.
Keep It Crisp
For the crunchiest pickles, start with the freshest vegetables possible. If your cucumbers or carrots are a bit limp, soak them in ice water for an hour before pickling them to help crisp them up. But I never recommend using vegetables that are past their use-by date; they’re far more beneficial in the garden as compost.
Mix and Match
Don’t limit yourself to just one type of vegetable. Create a colourful and flavourful mix by combining different veggies in the same container. Think about complementary flavours and textures – crunchy carrots with spicy radishes or cool cucumbers with sweet red onions.
Serving Suggestions
These quick pickles are incredibly versatile. Here are a few ideas to get you started:
- Top your favourite burger for a tangy crunch
- Chop and add to potato salad for a zesty twist
- Serve alongside a cheese platter for a palate-cleansing bite
- Dice and mix into tuna or chicken salad for added flavour and texture
Nutritional Benefits
Not only are these pickles delicious, but they’re also good for you! Pickled vegetables retain most of their nutritional value. Plus, they’re low in calories and can aid in digestion.
Frequently Asked Questions
For food safety reasons, making a fresh batch of brine each time you pickle is best.
No worries! You can use any airtight container. Just make sure the vegetables are fully submerged in the brine.
Absolutely! This method works well for a variety of vegetables. Remember that softer vegetables like zucchini or capsicum may pickle faster than harder ones like carrots.
Quick Pickled Rhubarb with Lemongrass and Ginger
This vibrant pickle is perfect for adding a zesty kick to salads and cheese platters or as a side for grilled meats. The Asian-inspired flavours of lemongrass and ginger complement the tartness of rhubarb beautifully, creating a refreshing and exotic pickle.
Ingredients
- Ingredients
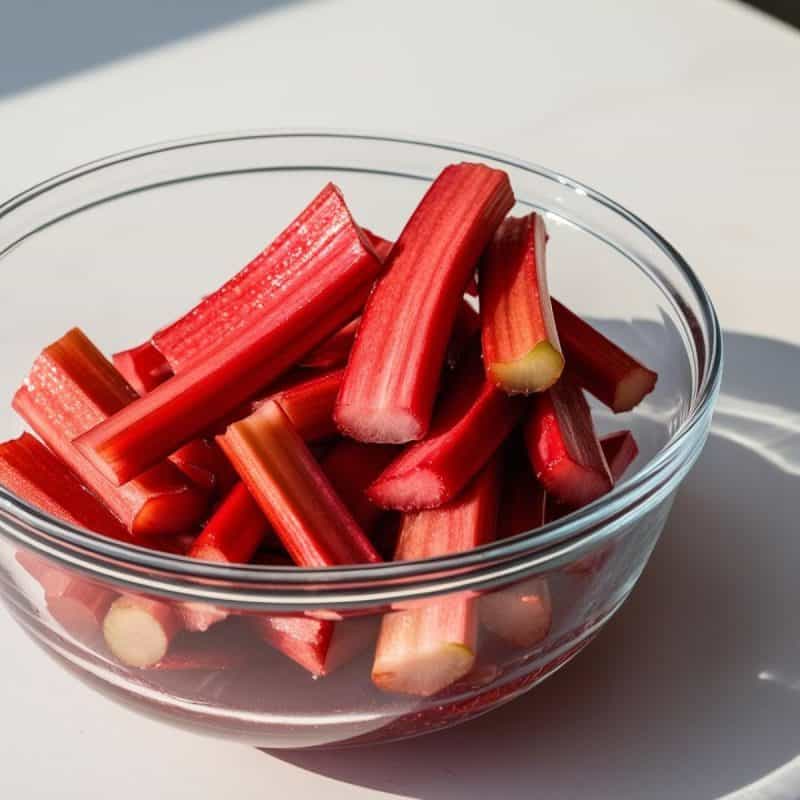
- 250g- 350g fresh rhubarb, cut into 5cm pieces (or sliced* see tips)
- 150ml red wine vinegar
- 150ml water
- 80g caster sugar
- 1 stalk lemongrass, bruised and cut into 5cm pieces
- 1.5cm piece of ginger, sliced
- 1-star anise
- 1/2 tsp black peppercorns
Instructions
- Add the vinegar, water, and sugar to your Thermomix bowl.
- Place the lemongrass, ginger, star anise, and peppercorns in the Thermomix bowl.
- Cook for 5 minutes at 100°C on reverse speed + 2 to dissolve the sugar and infuse the flavours.
- Allow the brine to cool completely. You can speed up this process by transferring it to a shallow dish.
- While the brine is cooling, pack the rhubarb pieces into a clean vacuum seal container or glass jar.
- Once cooled, pour the brine (and aromatics) over the rhubarb, ensuring it’s completely covered.
- The aromatics are left to continue the flavour development; however, we’ll just be serving the rhubarb.
- Seal the jar and refrigerate for at least 24 hours before eating.
Chef’s Tips for Perfect Pickled Rhubarb
Choose Your Rhubarb Wisely
Look for firm, crisp stalks of rhubarb. The redder the stalks, the more vibrant your pickles will be. Avoid any that are limp or have blemishes.
Slice for Success
Cut your rhubarb into uniform pieces to ensure even pickling. The 5cm pieces suggested in the recipe are ideal for most uses, but feel free to adjust them based on your preference.
Balance is Key
Rhubarb is naturally tart, so the sugar in this recipe is crucial for balance. Feel free to adjust the sugar content to your taste, but remember that some sweetness is needed to complement the vinegar and rhubarb’s natural acidity.
Experiment with Spices
While the lemongrass, ginger, and star anise create a delightful flavour profile, don’t be afraid to experiment. A cinnamon stick or a few cardamom pods could add an interesting twist. 🤔
Serving Suggestions
- Serve alongside a cheese board for a tangy counterpoint to rich cheeses.
- Chop finely and add to a chicken salad for a burst of flavour.
- Use as a condiment for grilled pork or duck.
- Stir into yoghurt for a quick and easy breakfast topping.
This Quick-Pickled Rhubarb recipe is a fantastic addition to your pickling repertoire. It’s sure to impress your guests with its unique flavour combination, especially when you say you made them yourself. Remember, these pickles will keep in the refrigerator for up to two weeks, allowing you to enjoy their tangy goodness for days.
Wait, that’s more sugar than usual?
You’re right to question the amount of sugar in traditional pickling recipes. Many classic pickle recipes do indeed call for a significant amount of sugar, which can be surprising. However, there are good reasons for this, as well as alternatives for those looking to reduce sugar intake. In traditional pickling, sugar serves several important functions:
- Preservation: Sugar acts as a preservative, helping to extend the shelf life of pickles.
- Flavour balance: It counteracts the acidity of the vinegar, creating a balanced taste.
- Texture: Sugar helps maintain the crispness of the vegetables.
The classic pickling ratio mentioned in one of the search results is 100% vinegar, 50% water, 25% sugar, and 12.5% kosher salt by weight. This ratio can seem high in sugar, but it’s designed to create a balanced, well-preserved pickle. However, if you’re concerned about sugar content, there are several alternatives:
- Sugar substitutes: Some recipes use artificial sweeteners or natural alternatives like stevia or monk fruit to reduce calorie content while maintaining sweetness.
- Reduced sugar recipes: You can often reduce the sugar in pickling recipes without significantly affecting the outcome, though it may change the flavour profile and preservation time.
- Natural alternatives: Some recipes use honey or fruit juices as alternative sweeteners.
It’s important to note that altering sugar content in preserving recipes can affect food safety, so it’s best to follow tested recipes or consult with food preservation experts when making significant changes. If you’re looking to reduce sugar in your pickles for health reasons, consider trying a recipe specifically designed to be low in sugar or sugar-free. I’m not an expert on the fermentation of vegetables, but if you want to go down that route, please find a source that knows and doesn’t just repeat what they have read elsewhere.
Glass vacuum seal containers offer several advantages for pickling:
- They prevent vegetables from being squashed, maintaining their texture and appearance better than bags.
- Glass is non-porous, which helps preserve the flavour and freshness of your pickles without absorbing odours or imparting unwanted flavours.
- Glass containers are more durable and can be reused multiple times, making them a more sustainable choice.
Regarding pickling time, vacuum sealing will accelerate the process compared to traditional methods. However, the action time required to deliver the required level of pickling flavour will depend on the level of vacuum, brine, and, of course, the food being pickled. However, as a loose guide, you might expect pickling times like this below.
No vacuum
= ready in Hours to Days
Vacuum
= ready in Minutes to Hours
The vacuum sealing process removes air and creates an environment that allows pickling brine to penetrate the vegetables more quickly and evenly. This rapid infusion of flavours dramatically reduces the time needed for the pickles to be ready for consumption, while the glass container ensures the vegetables maintain their shape and crunch. Remember to store your vacuum-sealed pickles in the refrigerator after preparation for best results and food safety.
Have you tried making quick pickles before? We’d love to hear about your favourite combinations! Why not leave a comment and share your pickling adventures? If you enjoyed this recipe post, you might also like our “Creating a Marinade from Scratch” blog post or my “You CAN win friends with Salad” ideas. Perfect companions for your next barbecue!
Want to know more?
Remember to subscribe to our newsletter for more delicious recipes and kitchen tips, and follow us on Facebook for daily inspiration!