
Easy Yoghurt in the Thermomix

This week, in my Facebook group, I promised my followers that I would share my method of making homemade Thermomix yoghurt using my trusty Thermomix TM6. A few years back, I wrote a post about making yoghurt with a dedicated yoghurt maker. This time, I’m sharing my method by utilizing the fantastic Fermentation mode in the TM6 Thermomix. I’m thrilled to introduce another simple and fast solution for homemade yoghurt. So, are you ready to begin?

If you’re new here, you may not know I’ve been making yoghurt for about 30 years. This started because my son had some rather nasty food allergies growing up. So don’t worry if you don’t have a Thermomix; I’ve written a post before about making yoghurt the old-fashioned way with a dedicated yoghurt maker. If you need a non-Thermomix method, then click here.
Yoghurt in the Thermomix?
However, I’ve fallen head over heels for the ease of my TM6 Thermomix, and I can confidently say that it’s my preferred method for yoghurt creation these days. Why clutter the kitchen with an array of devices when one can do the job marvellously while you sleep?
So, let’s get down to the details, shall we? If you’ve been part of our community for a while, you know I’m all about simplicity and efficiency in the kitchen, and making yoghurt with the Thermomix is no exception.
Ingredients for yoghurt making
Yoghurt culture
You can use a portion of fresh pot-set yoghurt straight from your supermarket or even some leftovers from your previous batch of yoghurt-making (make sure it’s not contaminated). Either way, it’s going to work just fine. In my opinion, it’s important to use a plain pot set yoghurt; you’ll find it’s much more reliable, and it’s so easy to turn plain yogurt into an array of different flavours (see below)👇 Look at labels on the pot at the supermarket you see the words “pot set”.
Or you can purchase yoghurt culture. I use Mad Mille’s product from time to time. The reason I use it, is that it just never fails. The product states that it’s shelf stable for around eight months, but if you keep the packs in the freezer, they will last much longer than that. There are five sachets in one pack; I use 1/2 a sachet per 1 litre, then I reuse that made-up yoghurt (back slopping *see below) for my next batch around 5 – 8 times before starting with a new batch from the sachets. Use at least 60g of yoghurt to innoculate your next batch.
Yoghurt made by back slopping
If you’re using a portion of your homemade yoghurt as a starter for the next batch (a process known as “back slopping”), the cultures from the original yoghurt should be able to inoculate the new batch. This is because these bacteria can replicate during the fermentation process.
However, over time, the strength and viability of these cultures can diminish, especially if the conditions are not optimal. Variables such as the temperature during incubation, the freshness of the milk, and the length of fermentation can affect the viability of the cultures.
Generally, it is recommended to use a fresh starter culture after several batches of backslopping to ensure a robust population of bacteria/probiotics. I suggest doing this after 5-8 batches, but it can vary. Use at least 60g of yoghurt to innoculate your next batch.
It’s also important to remember that different probiotics can have different growth requirements and abilities to compete with other bacteria present, so if you’re trying to maintain a specific blend of bacteria, you might need to refresh with a new commercial starter more often.
What milk do we use to make yoghurt?
Next, we have 1 litre of UHT milk. The choice of milk is entirely up to you. We tend to use A2 UHT milk at home, but you could choose whatever works best for you, whether that’s based on price, taste, or dietary considerations. I’ve had more experience with UHT cow’s milk than anything else, and it doesn’t matter what brand; they all seem to set just fine for me. Although the colours can differ, some are white, and others are between grey and cream.
Of course, you can use fresh milk from the supermarket’s dairy cabinet, but fresh milk requires a few more steps before you can go straight to the fermentation stage. This guided Cookidoo recipe will walk you through the process of using fresh milk instead of UHT.
Thickening agent for the yoghurt
I use skim milk powder. Some recipes call for full cream, but it’s up to you. I don’t see the point in adding more fat via this method. I’ve also noticed that if you add too much full-cream milk powder, your yoghurt tends to become slimy. You might wonder why we’re using this at all. The milk powder’s role is essentially to thicken our yoghurt, making it luscious and rich.
But here’s a tip: don’t be tempted to add more, thinking it’ll yield a denser yoghurt. Trust me, it won’t. Overdoing it will instead compromise the flavour and texture. If you aim for that ultra-thick Greek yoghurt style, the trick lies in straining your yoghurt post-fermentation.
So, there you have it! With these simple ingredients and our trusty Thermomix, we’re all set to whip up some homemade yoghurt that’s easy, cost-effective, and oh-so-satisfying. Are you ready?
The method (cookidoo guided or manual)
Want this as a Thermomix® guided recipe?
- Click here to send the recipe to Cookidoo. After clicking the link, log into Cookidoo and select “Make today”, pop it in your calendar or “Save” the recipe. We also have video instructions for adding this recipe to Cookidoo
Manual method:
- Add yoghurt (culture) either from your last batch, (around 60g or more) a “pot set” yoghurt or powder from Mad Millie.
- Then I add Up to 100g of skim milk powder (you can use full cream if you wish, but I find skim works better for me)
- Around ½ to 1 full cup of UHT milk and give a mix. MC in 10 seconds/speed 4-5 (if you want to add sugar, do it now 40g in a litre is fine for me. Try it, and if you need more next time, add more)
- Add the remainder of the milk and mix again for Mc in 5 seconds/speed 4 – 5
- With the mould/s sitting in your Varoma, pour the yoghurt mix into it/them, then pop on their lid/s and set the Varoma lid in place.
- Rinse out your TM bowl, and then add 250g of water plus 30g of vinegar (or lemon juice). I don’t always use the acid, it’s really only there to make sure your stainless doesn’t go a funny colour. Not that the discolouration last long….
- Pop your Varoma in place and set to ferment. Flick on to the Modes screen, then tap on Fermentation. I choose 12 h/70°C or use this recipe from Cookidoo and start at step 5.
Maintain the temperature until the yoghurt has set. Setting it can take between 8 – 24 hours, depending on what you’ve used as your milk and starter. I find different milk types take different lengths of time to set, so don’t worry if yours is taking longer, just set it for more time. I also find that the best practice is to find a milk and culture you like and then stick with it. Once you’ve got a routine, you’ll be able to reproduce it the same way every time and focus on flavourings.
Another factor to consider is taste. If you prefer a more robust flavour in your yoghurt, leave it to incubate for a longer period. However, if you’re satisfied with the current taste, refrigerate it immediately after it has been set. The yoghurt will thicken a little further in the fridge.
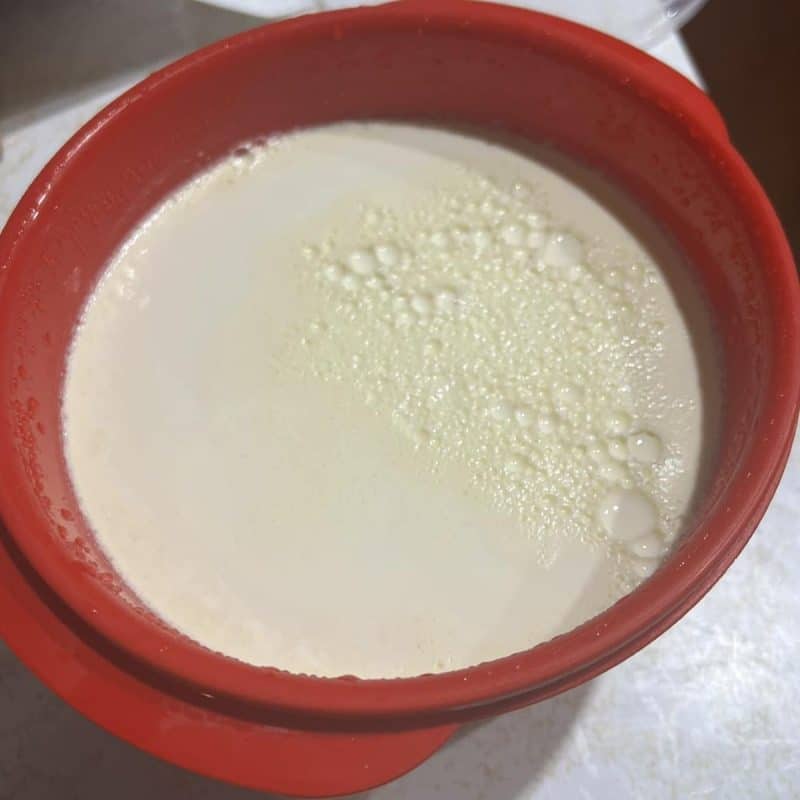
How to achieve a thicker yoghurt?
Add more milk powder.
I Add up to 100 g of skim milk powder to the milk at the stage where you add your culture (step 2 in my method above). I’ve tried adding more, and trust me you can overdo it; the word slime comes to mind if you overdo it. 🤢🤪
Remove some of the whey.
Drain the yoghurt after it has cooled in the fridge. The longer you drain it, the thicker the yoghurt will be. The best practice is to set a straining bag over a colander in the fridge. The usual amount to be drained off is between 250 and 500ml of whey from a litre of milk.
During the cheese-making process, the liquid that separates from milk is slightly acidic and can be used instead of buttermilk in recipes. The whey removed from yoghurt can also be used in the same way. Mixing equal parts milk and whey is effective. If you have extra whey, you can freeze it for later use. Alternatively, you can use fresh whey to water your plants or give it to your dogs as a treat, but be cautious not to give them too much.
Flavour ideas for your Homemade Yoghurt
I know you want sweet vanilla yoghurt, right?
Well, first, it only takes half to one teaspoon of jam added to a single serving of yoghurt to turn it into a sweet treat. I like to make my own jam and add vanilla to it as I’m making it, so there you have the best of both worlds, sweet fruity vanilla jam.
Shhhh, Don’t tell anyone, but I’ve also been known to purchase a jar of Bonne Maman jam (I like strawberry, but it comes in so many flavours). Your options for toppings are only limited by your imagination. Consider options like honey, maple syrup, fruit, jam, crumble, granola, or whatever you desire. When I crave something sweet, I portion out the yogurt into single-serve bowls and stir in a teaspoon of jam. Sometimes, I even sprinkle granola and chopped fresh fruit on top. This makes for an easy dessert for those who need a sweet treat after dinner.
So go on, make some homemade yoghurt this weekend 🙂

I just made my first batch and it’s great. Used the exact ingredients as your recipe.
How long will it keep in the fridge?
Thanks.
Hey Lyndell,
It keeps for ages. I can’t really give you a time because it depends on a lot of things. But if everything you used wash fresh and not contaminated at least 2 – 3 weeks.
Hello Bec,
If I want to make a double batch, do I have to do anything different? ( I’m going to use mad Milly culture)
Hi Julianna,
Timing plays a big role here. If you double the batch, it will take longer for the ingredients in the Varoma to reach temperature—possibly an extra hour. You’ll also need to find a container that can hold 2 litres.
One option is to heat the mixture to 40°C before transferring it to your container, which can help speed things up. I personally don’t bother with this because I let the yoghurt ferment overnight while I sleep. I make 1 litre at a time, about once a week.
Hope that helps!
Thanks for this recipe. Worked beautifully and was great with some fruit compote fro breakfast.
I’m so glad you tried it Christine. We love our yoghurt at our place. Thank you for the comment.
Could I use Almond or Lactose free milk? And, would I use a normal milk yoghurt as the starter?
Hi Brigitte, I’ve used lactose free milk but Almond milk or non animal milk will need other ingredients and method. Make sure you use lactose free full cream milk or it will be way to thin.
Thank you.
You’re welcome Brigitte.