
Coffee and Butterscotch tray bake
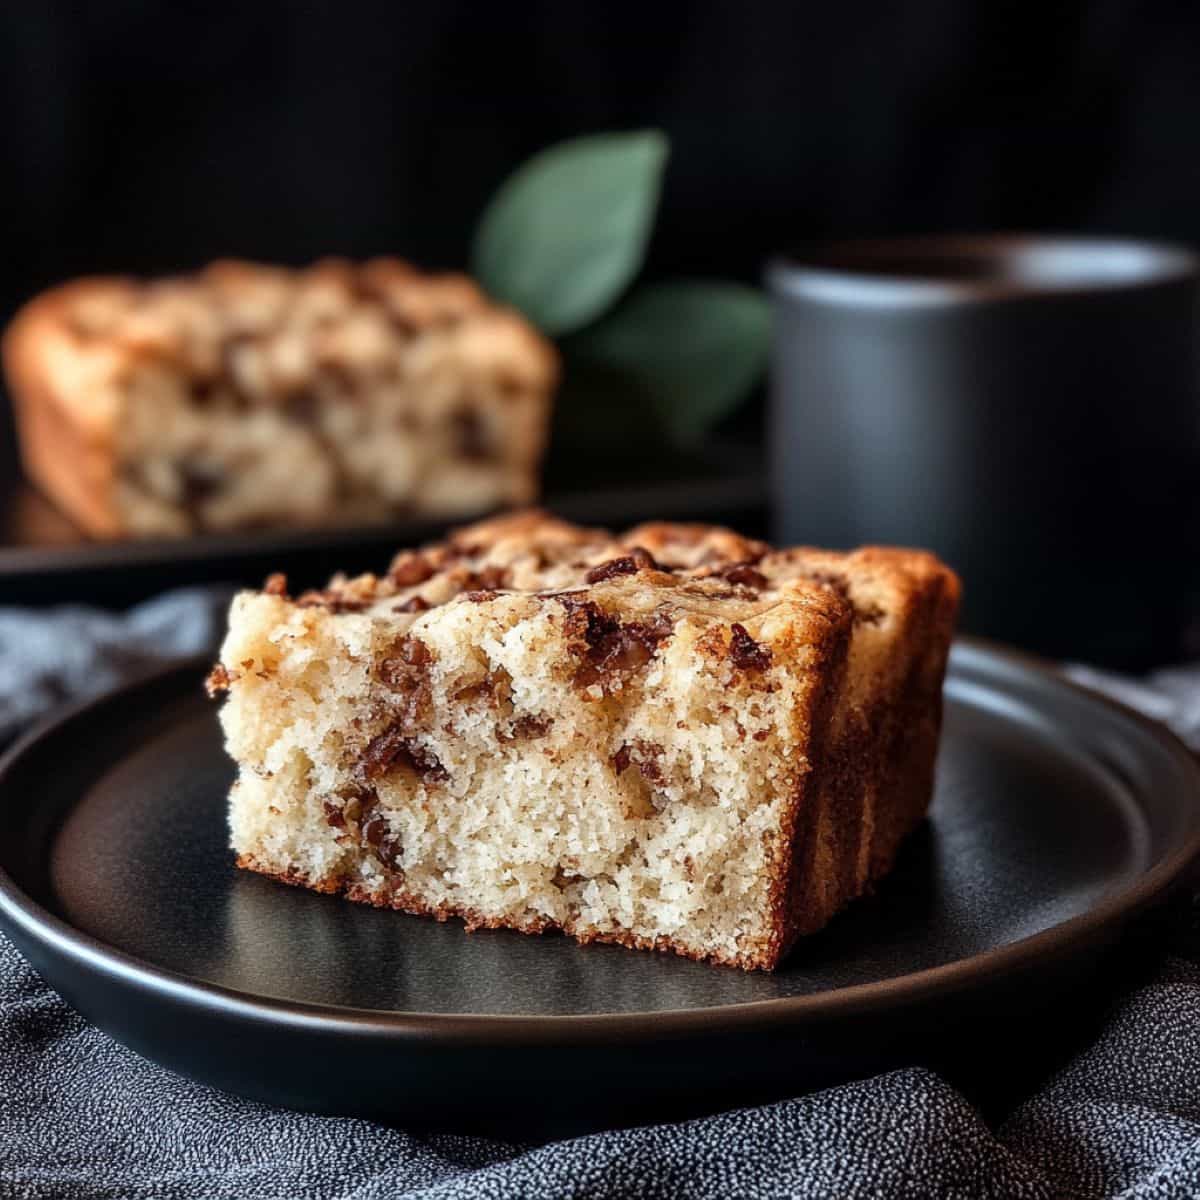
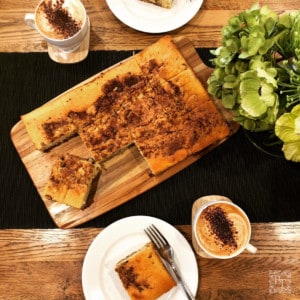
I’m starting to dislike visits to the Doctors; they always seem to say things I don’t want to hear. A few weeks back, I was told I should probably lay off the coffee. What? I do have a brilliant coffee machine, and my husband and I have both done barista courses, so how can you tell me to lay off the coffee when we love it so much. So, I thought I’d make this Coffee Butterscotch Tray Bake instead. Ha!

What makes this Recipe Special?
This tray bake brings together two beloved flavours – aromatic coffee and sweet, buttery butterscotch – in a perfectly balanced treat that’s both sophisticated and comforting. The coffee adds depth while the butterscotch brings a caramel-like sweetness that makes this slice absolutely irresistible.
When it comes to lattes, I’ll only have one each morning, alright! Then I’ll suck it up and drink tea for the rest of the day. Although, you know, I like my tea really strong, so I’m not sure if he’d be happy with that either. Shhh, don’t tell him. Another secret I’m keeping is that I’ve added a bit of coffee to this yummy cake. Well, I prefer to use instant, and there’s only a tablespoon of granules in the entire cake, and I won’t eat it all, honestly 😆🤣😂.

Coffee and Butterscotch
I played around with this recipe before handing it over to the Bake Club girls. Of course, you can also make it as a cake; it’ll just take a bit longer to cook. However, for Bake Club, I needed to ensure we could fit everything in the ovens and get everything cooked in our two-hour session. So there you have it. It’s an excellent traybake that cooks quickly in a tray like this.
If you don’t know when this cake is cooked through by looking or poking it, hehehee you can use a temperature probe. When it’s at 85°c – 90°C, it’s done.

Serving suggestions
This Coffee and Butterscotch Tray Bake is versatile and can be enjoyed in various ways. Serve it warm with a scoop of vanilla ice cream for a decadent dessert, or let it cool and pair it with your favourite hot beverage for a delightful afternoon tea.
Frequently Asked Questions
While this recipe hasn’t been tested with gluten-free flour, you could try substituting the self-raising flour with a gluten-free alternative and adding 1 tsp of gluten-free baking powder.
When stored in an airtight container at room temperature, this tray bake should stay fresh for up to 3-4 days.
Yes, this freezes beautifully. Cut into squares and wrap individually in plastic wrap, then store in an airtight container for up to 3 months. Thaw at room temperature or warm gently in the microwave.
You can use 1 tablespoon of espresso powder instead, or make a strong shot of coffee and reduce the milk by 1 tablespoon. However, the granules dissolve beautifully and create the best texture.
Definitely! Fold in 1 cup of chocolate chips to the batter before layering for an extra indulgent treat. Dark or milk chocolate both work wonderfully with the butterscotch flavour.
Coffee and butterscotch Tray Bake – Thermomix
5 stars tells us you love the recipe
becs-table.com.auEquipment
- 1 Thermomix
Ingredients
- 180 g dark brown sugar
- 2 tsp ground cinnamon
- 1 Tbsp instant coffee granules
- 380 g self-raising flour
- 330 g caster sugar
- 220 g eggs about four whole eggs
- 280 ml milk
- 250 g unsalted butter melted
- 2 tsp vanilla extract
- 60 g unsalted butter extra, melted or chopped very small
Instructions
- Preheat oven to 160°C and prepare a 20cm x 30cm metal slice tin greased and lined with non-stick baking paper, or if you have a USA pan, you won't need to grease it but using baking paper to lift it out later is handy. Just remember to leave an overhang of paper so you can grab it easily.
- Weigh the brown sugar and cinnamon into the TM bowl along with the coffee granules, mix on speed 3/3 seconds to combine then set aside.
- With the Butterfly in place weigh the flour, sugar, eggs, milk, butter and vanilla into the TM bowl and whisk on speed 3/ 15 sec or until smooth.
- Pour half the mixture into the prepared tin, sprinkle 1/2 the brown sugar mixture over the cake. Pour over the remaining cake mixture and spread evenly.
- Sprinkle with the remaining brown sugar mixture and spoon over extra melted butter or dot around the tiny cubes.
- Bake till golden brown and cooked through start checking at 25 to 30 minutes although depending on your pan and oven it may take longer. Another way of checking is when it reaches 85°c in the centre it's done. Either serve warm with ice-cream or cream or allow to cool and serve with a cuppa.
Coffee and Butterscotch Tray Bake – Conventional
5 stars tells us you love the recipe
becs-table.com.auEquipment
- 1 Stand mixer
Ingredients
- 175 g dark brown sugar
- 2 tsp ground cinnamon
- 375 g self-raising flour
- 330 g caster sugar
- 4 eggs
- 275 ml milk
- 250 g unsalted butter melted
- 2 tsp vanilla extract
- 1 Tbsp instant coffee granules
- 60 g unsalted butter extra, melted or chopped into very small cubes
Instructions
- Preheat oven to 160°C and prepare a 20cm x 30cm metal slice tin greased and lined with non-stick baking paper, or if you have a USA pan, you won't need to grease it but using baking paper to lift it out later is handy. Just remember to leave an overhang of paper so you can grab it easily.
- Place the brown sugar and cinnamon in a small bowl and mix to combine. Set aside.
- Place the flour, sugar, eggs, milk, butter and vanilla in a large bowl and whisk until smooth.
- Pour half the mixture into a lightly greased 20cm x 30cm metal slice tin lined with non-stick baking paper. Sprinkle the coffee and half the brown sugar mixture over the cake. Pour over the remaining cake mixture and spread evenly.
- Sprinkle with the remaining brown sugar mixture and spoon over extra melted butter or dot around the tiny cubes.
- Bake till golden brown and cooked through start checking at 25 to 30 minutes although depending on your pan and oven it may take longer. Another way of checking is when it reaches 85°c in the centre it's done. Either serve warm with ice-cream or cream or allow to cool and serve with a cuppa.
I know some of you might be wondering what that oven is in the above photo. Well, It’s my everyday oven. I cook dinner in it, bake in it, toast in it, grill in it and even do small roasts. I’ve even taken it down to the cooking school to run my evening meals class instead of turning on the big 90cm ovens. I love the functions of this oven, and the fact that it uses so little power is a huge bonus. It’s called a “Breville Smart Oven”, and I tell you, it really is smart. It’s easily paid for itself at our place with the money it’s saved in electricity bills. I no longer think, “I don’t want to put the oven on just to finish off my steaks, fish or grill something”. Brilliant. 😉
Want to know more?
Perhaps you would like to learn how to make “Perfect Slices“, and honestly, who wouldn’t.

Quick, easy and very moreish.
Thanx Renee. x